N00B Guide: Flashing LiteOn with JungleFlasher & VIA Card
N00B Guide: Flashing LiteOn with JungleFlasher & VIA Card
Published byforahobby on 2009-04-23 Category: Firmware | Page Views: 28780
Introduction
This tutorial will explain in great detail how to backup and flash your Lite-On Xbox 360 DVD Drive firmware so that you can repair the firmware or replace a faulty xbox 360 dvd drive at anytime in the future.
I will be using the "Kreon Liteon Connectivity Kit" during this tutorial. The Kreon Kit comes with all required software and hardware. The "Kreon Liteon Connectivity Kit" has FREE online support via MSN 24x7 and super fast international delivery.
1. Things You Need:
1.1. A LiteOn drive.
1.2. A KeyGrabber (Kreon Connectivity Kit - install the USB drivers)
1.3. VIA SATA Card (preferably VIA6421)
1.4. New target firmware (IX16) for your Lite-on (this is the new repaired firmware you want to use)
1.5. JungleFlasher v0.1.60 BETA or higher
1.6. PortIO32 (included with JungleFlasher)
2. Setting up your VIA Card
For this tutorial i will be using a VIA6421 Card.
IMPORTANT NOTE:
Although I have recommended you remove the VIA6421 drivers before installing the IO32 drivers which come bundled with JungleFlasher you may still receive lockups and freezes when loading the JF program.
If you experience lockups or freezing issues while using Jungle Flasher I recommend re-installing the original VIA6421 drivers, rebooting the pc and trying to find the drive again in JUNGLE FLASHER DVDkey32 tab again.. Read more at this topic linked below.
2.1. Uninstall ALL via drivers. We don't need the original drivers!
2.2. Rename the "viamraid.sys" file located in the c:windowssystem32drivers directory to "viamraid.sys.backup" so that Windows does NOT reinstall it upon reboot. (you can then rename it again if you need it in the future to reinstall)
2.3. Reboot!
2.4. Your VIA card should now appear similar to the screen shown below.
3. Installing PortIO32
PortIO32 will provide the drivers you need to use your VIA card.
3.1. Open up the "Control Panel".
3.2. Click on "Add Hardware"
3.3. Add New Hardware Wizard. Click Next.
3.4. Click "Next" again.
3.5. Scroll down to Add a new hardware device and then click "next".
3.6. Select to "install the hardware that i manually select from list (Advanced)" and then click "Next".
3.7.Once again Click "Next" as shown in the image below
3.8. Click "Have Disk" as shown in the screenshot below.
3.9. Click "Browse"
3.10. Find and select the "portio32.inf" and click open.
3.11. Click "OK".
3.12. Click "Next".
3.13. Click"Next" again.
14. Click "Finish".
4. Using JungleFlasher .43 Beta
"JungleFlasher is one of the latest applications used to flash and backup your Lite-On firmware. You might get a error on startup of the "JungleFlasher" app (screenshot below), so just it ignore it and click Continue.
The latest version of JungleFlasher v0.60 BETA supports all known methods of backups and flashing of dvdrom drives for 360 and is a very handy tool for those needing to repair or recover their unique key and other crucial information for backup.
4.1. Click on the "DVDKey32 Tab" just like the screenshot shown below.
4.2. Select the port that which says "DG-16D2S" as the Name under drive Properties.
4.3. Select the Com port for the Key grabber (Usually COM 3)
4.4. Push the eject button for the LiteOn drive
4.5. Turn the DVD drive OFF
4.6. Carefully push the DVD tray in half way
4.7. Turn the power ON
4.8. When ready, hold the Probe, or Spear on the R707 point as shown in the screenshots below.
4.9. If you have a Spear, the blue light will come on.
4.10. Click Get Key
4.11. After a few seconds, if successful, you will be asked where you would like to save your key.
IMPORTANT:
If you receive the error BAD KEY or something like this then you may want to check that the status of your keygrabber is READY and not working etc. I have found that if you select a different PORT from the SATA dropdown list and then go back to the drive it may become READY AGAIN.
Also be sure you are firmly holding your probe/spear on the R707 point.
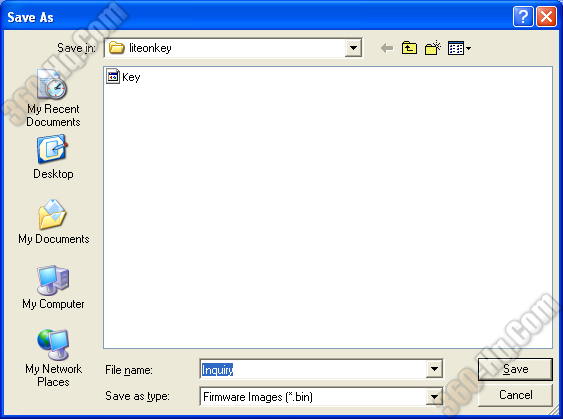
4.12. Click "Save" to save your "key.bin" file.
4.13. Next, save your "inquiry.bin" file.
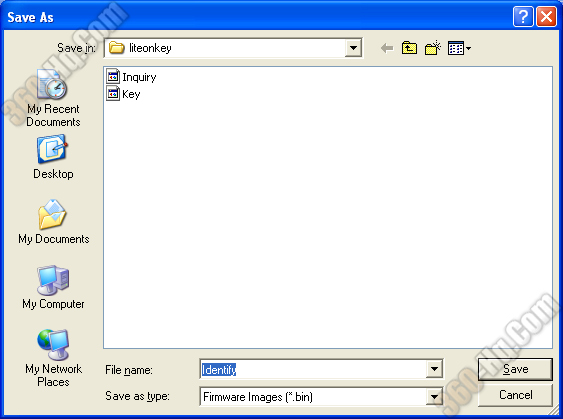
4.14. Save your "identify.bin" file
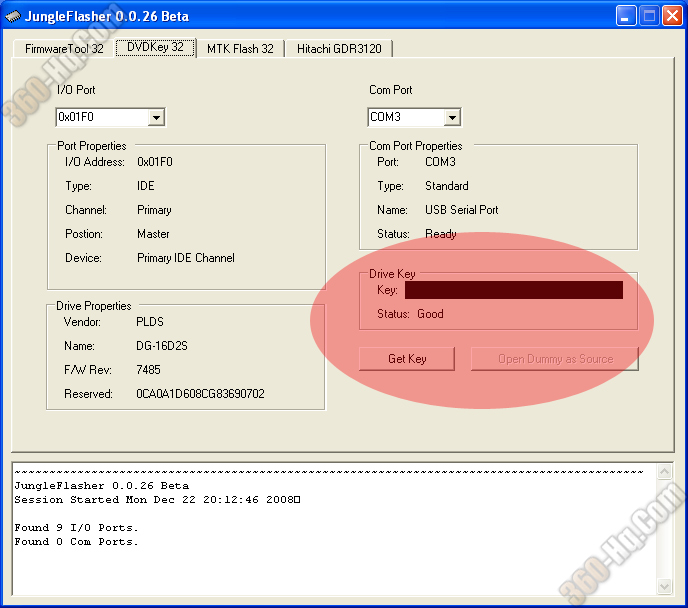
4.15. If successful, the Drive Key status will say "Good". Check out the screenshot.
4.16. Click the Open Dummy as Source button
4.17. Click Save
4.18. Click on the FirmwareTool32 Tab
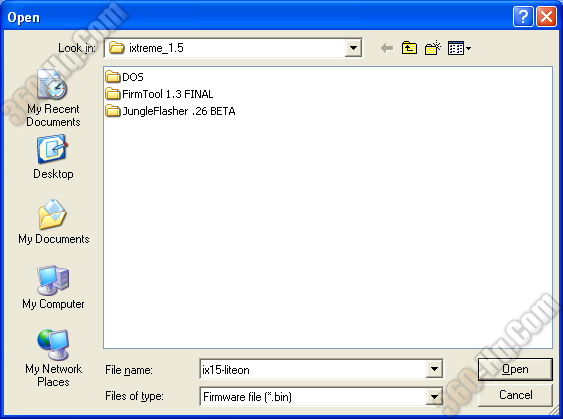
4.19. Click the "Open Target Firmware" button.
4.20. Locate the new target firmware and click "Open".
4.21. Now, click the Spoof Source to Target button as shown in the screenshot below.
4.22. The keys should now match in the "Source" and "Target".
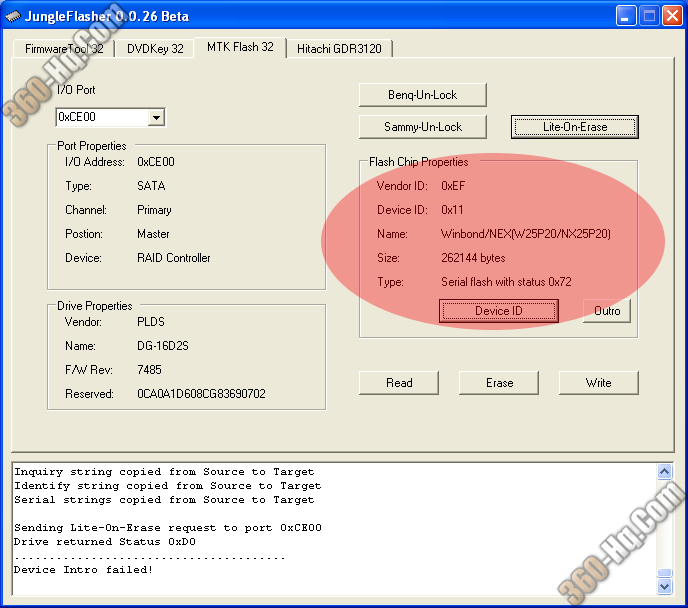
4.23. Click on the "MTK Flash 32" tab
4.24. Click on the LiteOn Erase button
4.25. Click Yes.
4.26. Click Yes again.
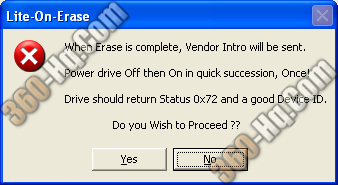
4.27. Now, do what it said and quickly power cycle the drive. THIS IS IMPORTANT! (Turn it off and then on within 1 second)
4.28. The LiteOn is now erased.
4.29. Click on the Device ID button. If it does not have the properties below, then something is wrong.
4.30. If you get the below message, then youll need to power cycle the drive and click Yes.
4.31. FINALLY, Click the Write button and the firmware will begin flashing to the drive.
Write verified OK!
That it guy, your done.. You have successfully repaired your lite-on's corrupted firmware.
Be sure to place your backup files in a safe place and enjoy..